Pages

Saturday, July 30, 2011

Playhouse Construction - Day 3 - Day 7

Playhouse construction was moving kinda slow mainly b/c my Daddy is a BIG part of getting it built and my parents live almost 3 hours away so building can only be done when they come to visit and the weather is cooperating.

To see the Playhouse from the very beginning, please visit Playhouse Construction - Day 1 & 2

The playhouse stayed looking like the picture below for the rest of the summer through the winter months.

But then in April 2011, construction started back and with Eve turning 3 in a couple months she was old enough to really start to enjoy and understand this new project.

Day 3 of construction was to get the rafters built and the roof on the house.


And here is the little princess herself.
She started calling it her castle and that Papa was building her a pink castle.
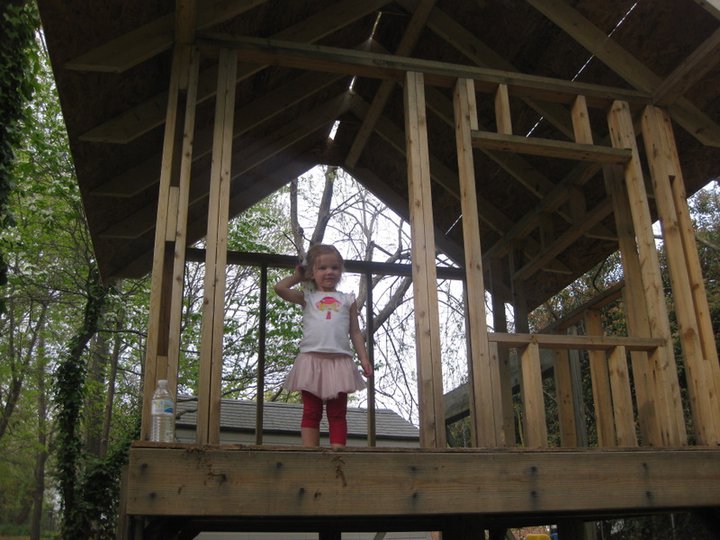
In between Day 3 & Day 8 when my parents came back, our job was to in close the house and get the shingles on the roof. The picture below is the backside of the house with most of the boards attached.


We recruited some friends to help us finish the side boards and shingles. Our friend had a bunch of shingles that had never been used, so we got to use them and he actually put them all on for us.


The shingles did take about 3 different visits for him to finish...
he's kinda a slow worker but hey...I'm not complaining!


At the end of Construction Day 7, the walls are on & roof is done!

More to come...stay tuned!


Playhouse Construction - Day 1 & 2

I have always loved the idea of a playhouse or tree house. When I was a little girl my Daddy built my sister and I a small playhouse which he then turned into his first wood shop but then we moved and in the next house I had an open tree house of sorts. I can remember talking about building a playhouse for Eve when she was less than a year old. At first we thought we would construct it in the garage and then just move it when our house sold. But of course she was still too young to actually play in it yet. So when our house sold in February 2010 Eve was about 20 months old and the house we bought already had a platform in the back yard that we were told once was some sort of playhouse or fort for the kids who lived there many years ago. So we decided to use that as our base and build upon that. We started construction in August 2010.

BEFORE - this is the platform that was already there

We removed these stairs and added some extra support beams underneath

I have always loved dutch doors so we went to the local Habitat Restore and found this solid wood door for $50. The idea is to cut it down and in half to make a dutch door.

We also picked up these windows at Habitat Restore. The smaller ones were $3 a piece and the longer rectangle was $10.

Day 1 of construction...the 1st wall is going up...

End of Day two...all the walls are framed out

The dimensions of the house are 8x10 with a 2 foot porch.
Once the rafters are up, we are thinking it will peak at 9 or 9.5 feet.


Stay tuned for more to come with this awesome little project...

Wednesday, May 4, 2011

Door Facelift

I recently decided to give our side door a facelift. We have 7 doors in our house...but this one is the door on the side of our house in between the garage doors. The trim on our house is a beige color...not my color of choice but it is what it is for now. The garage doors and side door were all painted the same color. However we rarely ever use this door...you do see it as soon as your pull down our driveway. It's just so very blah.

Here are some BEFORE pictures:


I painted our front door RED soon after we moved in. We have always loved red doors. And with the left over paint, I also painted the Headboard Bench. I still had over 1/2 a gallon of paint left so I used the same red to paint this side door. Then added a decal with the house numbers which also matches our Mailbox. (etsy is awesome by the way) I picked up this old kid rocking chair for $5 at a thift store and made it into a small planter similiar to my Chair Planter on my front porch. And now...it's done! Ahhh...makes me smile now everytime I get home. :)

Here are my AFTER pictures:


Thursday, March 24, 2011

Mailbox Makeover

Our mailbox was sad...very sad. We noticed that almost every mailbox on our street had some sort of flower bed around it but ours. Ours was just stuck in the dirt and looked very old. I wasn't sure what to do with it. I had originally thought I would sand and paint the post (to save $) and just get a new box.

So Saturday morning I went outside to inspect it a little closer and while doing so I realized it was really shaky. I pushed just a little on the side of it and the darn thing just fell over! So much for trying to save the post! But come to find out once it broke it was all rotten and yucky inside. My neighbor saw me working and came out and told me that the mailbox was the original to the house...so yeah...it was old.

So a quick trip to Lowes and we got a new post and box. Wasn't expensive either. We spent $21 on the post and $14 on the box. Picked up some mulch and a couple plants and back home to start.

I wanted to get a better before picture but as I mention...it fell over before I could. So I took one with it laying by our curb with other junk we threw out.

Here is the BEFORE, IN PROGRESS, and AFTER. It looks SO much better! As my friend told me...it shows classy people live here now. :)


Sunday, March 13, 2011

Easter Village

I love this time of year...days are getting longer, the weather is warmer and Spring is just around the corner. I am starting to get out my Easter decorations and decided a fun project for me and Eve would be to make an Easter Village. I picked up some $1 birdhouses from AC Moore and a few Easter decorations from Hobby Lobby and the rest was just scraps I already had. I painted the houses and added scrapbook paper with Mod Podge. The bases are just small boxes and small wooden scraps. Found a thin sheet of wood and assembled it all together.

And most importantly...Eve loves the new Easter Village. :)


Monday, February 28, 2011

Board and Batten Bathroom

So we moved into our house a year ago and I painted the guest bath a bright yellow. I didn't get a sample before I bought my gallon and got it home and really didn't like it. BUT I paid for it so I figured I must use it. So I did...and I've never been happy with it. I knew I wanted to do something else but wasn't sure what. Until I saw Gail's post on her Board and Batten back splash in her kitchen. I loved it and knew that's what I wanted to do. My Dad is the most talented guy I know and while visiting I told him my plans. He had a stash of 1x4's that he wasn't using and gave them to me! And for my birthday I got a Lowes gift card so that paid for my paint. So this project literally didn't cost me a dime!!

Here are my bathroom BEFORE pictures:


These are the original 1981 cabinets and it just didn't go with the black mirror or the counter top...


I think my friend summed it up...it's just Country looking...

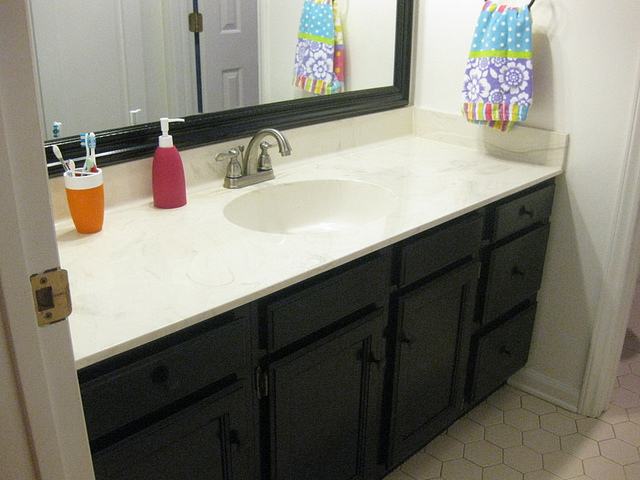
And here's my AFTER Board and Batten Bathroom:

I just love how it turned out!

I painted the cabinets a glossy black and which brings out the mirror, light fixture and other black accents.

Instead of working around the baseboard, I took it up and used a 1x4 instead and put down new shoe molding.

That's me!

The sides of the sink were too narrow to add any boards so instead I just ran the top boards across the top.

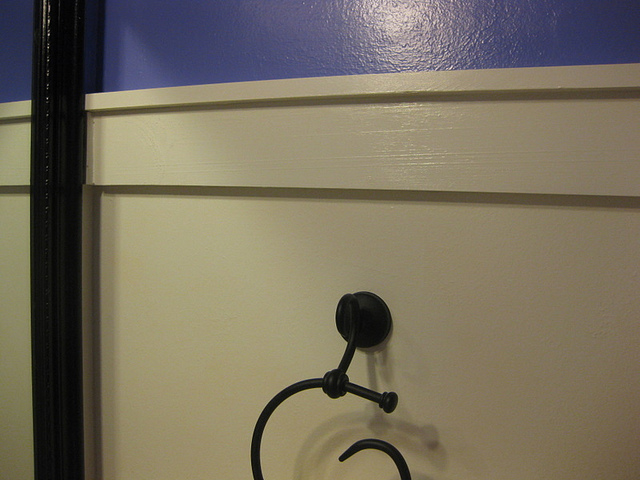
Here's the other side of the mirror.

Up close of the board and batten. I used a semi-gloss white paint. Painters caulk is my new best friend!

I painted the walls first (yes, that's just dry wall) and then painted my boards and then attached everything together and gave it all one final coat.

As I mentioned before...my friend said it went from Country to Kickin! :)

Next I plan to do my breakfast area the same way.

Posting on:

Photobucket

Monday, January 31, 2011

Mudroom Lockers

I came across the idea of "mudroom lockers" while blog surfing one day. My favorite was Karla's which is AWESOME. But she has a handy dandy husband...me...I have a handy dandy daddy but he lives almost 3 hours away. While looking at other DIY Lockers I decided to try and find something I could "repurpose" to make my lockers. Save some money and recycle! While at my local Habitat Restore I walked over to the closet doors and studied them for a bit and thought...that could be my sides. So I found 2 sets of doors that looked pretty good and brought them home for $15. I had this project on my to do list for several months but didn't have all the tools I needed to really make it.
Thankfully for Christmas I got lots of tools! So now I had what I needed to get started.

The only thing I had to purchase "new" for this project was the bead board, hooks and baskets. My good friend is building a house and had some scrap boards laying around so I went and grabbed them up. That was my backer to attach the bead board to.


I then went about adding the beadboard to the back, attached the doors to the back, made the shelves out of a piece of board I found on my neighbor's curb, all the molding I got from my in-laws house which was left over in their attic. The bottom of the lockers was a piece of scrap I got at home depot for 50 cents.


Once I got it all put together I put one coat of primer over the entire thing and then 3 coats of paint.

My finished Mudroom Lockers


I found the baskets at Target and the initials at Michaels. The letters were white and used black spray paint on them and tied them on. A basket for each of us.

I actually do not have a "mudroom" I built these to go right beside the door in the basement which leads out to our garage. So when you come in and out of the door from the car you can hang your coat, keys, hat, etc.

Now I did make quite a bit of mistakes and it's definitely not perfect but it was my first "furniture" type project. And it's very functional!

Linking to:
 Photobucket